

As a team of early childhood experts, we know the feeling all too well. It’s the end of a long day, you’ve asked your child to put on their shoes for the fifth time, and your patience snaps.
The yelling starts, followed by tears (theirs and maybe yours), and a wave of guilt that washes over you in the quiet moments before bed. You promise yourself you’ll do better tomorrow, but the next day, the cycle repeats.
If this sounds familiar, you are not alone, and you are not a bad parent. You’re just stuck in a communication pattern that is incredibly common, yet completely ineffective.
The secret to breaking this cycle isn’t about finding a magic consequence or a stricter punishment; it’s about understanding the deep psychology of why your child isn’t listening and why yelling, though instinctive, actually makes the problem worse.
This guide is your definitive plan to stop yelling and build a more peaceful, cooperative home.
The Core Problem: Why Yelling Doesn’t Work (and What Does)

To truly break the yelling cycle, we first have to understand the invisible forces that fuel it. It’s not about your child being ‘naughty’ or you being a ‘bad parent’. It’s about a predictable clash between a child’s developing brain and an adult’s dwindling patience.
In this first section, we will dissect the anatomy of a power struggle and reveal the single biggest mindset shift that can transform your home from a battlefield into a partnership. Understanding these two core concepts is the essential first step.
Understanding the “Yelling Cycle”: Why It Feels Unavoidable
The “Yelling Cycle” is a predictable, four-step pattern that traps countless well-intentioned families. Understanding it is the first step to breaking free. Here’s how it unfolds:
- Step 1: The Request. You ask your child to do something simple (“Please put on your shoes”).
- Step 2: The Ignore. Your child, deeply absorbed in their world of play, either genuinely doesn’t hear you or their developing brain doesn’t register the request as urgent. To them, the LEGO tower is far more important.
- Step 3: The Escalation. Your request becomes a demand, your tone gets sharper, and finally, you yell. The sudden spike in volume and intensity finally breaks through their focus.
- Step 4: The Resentful Compliance & Guilt. They comply, but often with tears or resentment. The immediate problem is solved, but a small emotional wound has been created. You, in turn, are left feeling guilty and drained.
This cycle is so powerful because, in the short term, the yelling ‘works’—it gets a result. But over the long term, it teaches a damaging lesson: that your calm voice can be ignored, and that only your angry voice has power, slowly eroding the joyful connection you want with your child.
The n°1 Mistake Parents Make: Confusing Validation with Permission
Many modern parents, in an effort to break the authoritarian “because I said so” cycle they grew up with, have swung to the opposite extreme.
They’ve gone from not caring about their child’s feelings to being afraid of their child’s feelings. This leads to the single biggest—and most destructive—mistake in modern parenting: confusing validation with permission. They are not the same thing.
- Validation is acknowledging your child’s feeling as real and legitimate (“I know you’re having so much fun playing and you feel sad that it’s time to leave”).
- Permission is letting that feeling dictate the outcome (“Okay, you can stay longer so you won’t be sad”).
When you consistently give their feelings the steering wheel, you are teaching them that their temporary emotions are more important than the family’s schedule, rules, or boundaries. The secret to confident and effective parenting lies in pairing these two concepts.
The formula is: Validate the Feeling, AND Hold the Boundary. For example:
“I know you’re disappointed the playdate is over (Validation), AND it’s time to go home for dinner (Boundary).”
This powerful combination tells your child two critical things simultaneously: “Your feelings are real and I care about them,” and “I am the calm, sturdy leader who will keep you safe by holding the line.”
This approach builds connection without sacrificing authority, creating a foundation of respect and cooperation that makes yelling obsolete.
The 5-Step Method to Get Your Child to Listen the First Time
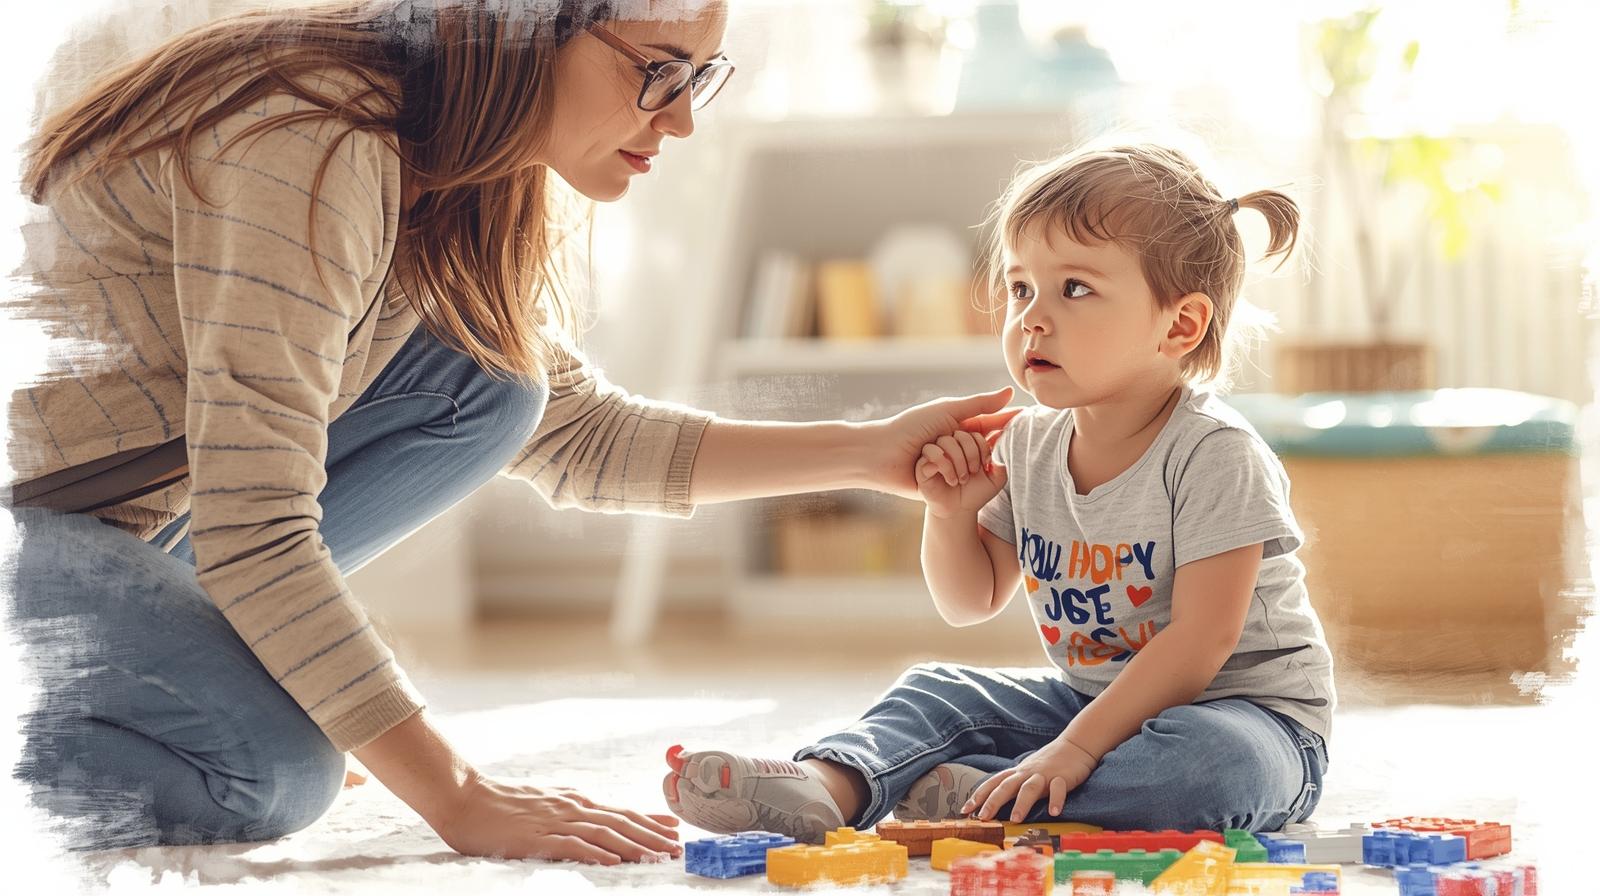
Understanding the psychology is the first half of the battle. Now, let’s move from theory to action. This 5-step method is a practical, repeatable formula that works with a child’s developing brain, not against it.
It’s designed to be used in those everyday moments—like getting out the door, cleaning up toys, or coming to dinner. By following these steps consistently, you are not just gaining compliance; you are building a new foundation of connection and respect that makes yelling a thing of the past. Let’s start with the most important and most-skipped step.
Step 1: The Connection Catalyst – How to Get Their Attention Without a Fight
The number one reason your child doesn’t listen the first time is simple: they are in a different world. Whether they’re building a LEGO castle, watching a show, or deep in imaginative play, their brain is in a state of intense focus.
To them, your voice from across the room is just background noise. Think of them as wearing a powerful pair of noise-canceling headphones.
Before you can give a direction, you must first gently ‘remove’ those headphones. This is the Connection Catalyst, and it involves three small physical actions.
- First, stop talking from across the room. Close the distance and walk right over to them. Your physical presence is the first signal that something is about to happen.
- Second, crouch down to their eye level. Standing over a small child is physically intimidating and can unconsciously trigger a defensive, ‘fight-or-flight’ response in their brain, making them less receptive to your words.
Getting down to their level signals safety and respect. Third, make a gentle physical connection.
Place a light hand on their shoulder, arm, or back. This gentle touch is a powerful ‘pattern interrupt’ that breaks their hyper-focus and draws their attention to you without a single word. Only then, say their name calmly and wait for eye contact.
That moment they look at you is your signal: the headphones are off. This act of physical connection is the first step in co-regulation, a vital part of helping your child manage transitions and feelings.
You can learn more about how to support this in our guide to developing their emotional regulation skills.
Step 2: The “Whiteboard Match” – Speaking Your Child’s Brain Language
Now that you have their full attention, the next secret is to give a direction that their developing brain can actually handle. As adults, we often give a long string of commands without thinking:
“Okay sweetie, please clean up your LEGOs, put on your shoes and socks, and then grab your backpack from the hook.”
While this seems clear to us, for a young child’s brain, it’s a tidal wave of information that is neurologically impossible to process.
Think of your child’s working memory—the part of the brain that holds information temporarily—as a tiny mental whiteboard. An adult’s whiteboard is large and can hold 5-7 pieces of information at once. A child’s is much, much smaller.
When you give them a long list of tasks, their little whiteboard gets completely filled up, and they either forget everything after the first step, or they get so overwhelmed they shut down and do nothing at all. To be effective, you must match your instruction to the size of their ‘whiteboard’.
A Simple Age-by-Age Guide to Directions:
- For a 3-Year-Old: Stick to one-step directions. “Please put your shoes in the basket.” That’s it. Master one thing at a time.
- For a 4-Year-Old: They can typically handle two-step, related directions. The key word is ‘related’. For example: “Pick up your cars AND put them in the toy box.”
- For a 5- to 7-Year-Old: They can usually manage two-step, unrelated directions. For example: “Put your plate in the sink AND then go brush your teeth.” Around age 6 or 7, some can handle three steps, but two is always a safer bet when you need them to listen the first time.
Furthermore, always tell them what to do, not what not to do. A child’s brain struggles to process negatives. “Stop running” is much less clear than “Please use your walking feet.” The second option gives their brain a clear, positive action to perform, making compliance infinitely more likely.
Step 3 & 4: The Patient Pause & The Specific Spotlight
You’ve connected with your child and given them a clear, age-appropriate direction. Now comes the part that requires the most self-control from you: doing absolutely nothing.
This phase is about mastering your own timing and learning how to use praise in a way that truly builds your child’s inner motivation.
Step 3: The Patient Pause (Count to 10)
After you give a direction, stay there, maintain a calm presence, and silently count to ten in your head. This is not an arbitrary number. Research on neural processing shows that it can take a young child’s brain 7-10 seconds to do the complex sequence required to follow a command:
- 1. Stop what they’re doing.
- 2. Process your words.
- 3. Understand the meaning.
- 4. Formulate a motor plan.
- 5. Send the signal to their body to act.
We often repeat our direction after just two or three seconds, interrupting this entire process and teaching them that they don’t need to listen to the first instruction because another one is always coming.
The patient pause is an act of respecting their brain’s processing speed. It is a moment of trust that communicates, “I know you can do this. I’ll wait.”
Step 4: The Specific Spotlight (Praise the Action, Not the Child)
When your child completes the task after your patient pause, the final step is to shine a spotlight on their success. However, generic praise like “Good job!” is often ineffective. The key is to be specific. Describe exactly what you see. Instead of “Good job cleaning up,” try “Wow, you put all of the red blocks back in the bin!” Specific praise does three powerful things:
- It tells them exactly what they did right, making it more likely they’ll repeat the behavior.
- It shows them you were paying close attention, which makes them feel seen and valued.
- It focuses on their effort and action, which builds genuine self-esteem and a foundation for positive self-talk in kids. They learn to think “I am a person who can put my blocks away” rather than just “I am a good boy”.
This positive reinforcement loop—where listening the first time leads to specific, positive attention from you—is what motivates long-term cooperation, far more than any threat or punishment ever could.
Step 5: The “Helping Hand” – From Defiance to Cooperation
You’ve connected, given a clear direction, and paused patiently. But your child still isn’t moving. They might be testing the boundary, or they might be genuinely ‘stuck’ due to fatigue or feeling overwhelmed.
This is not the time to escalate by yelling. This is the time for the final, crucial step: the ‘Helping Hand’. The core message of this step is: “I will not let you fail. We are going to do this together.”
The Helping Hand is a calm, firm, and respectful way of physically guiding your child to complete the task. It is not a punishment. Your tone should be warm and supportive, not angry. Here’s how it works in practice:
The Hand-Over-Hand Technique
Let’s say the instruction was “Please put your teddy bear in the toy box.” After the patient pause, if nothing has happened, you would:
- State the Action Calmly: “It’s time to put Teddy in the box now. I will help you.”
- Guide, Don’t Force: Gently place your hand over your child’s hand, guide it to pick up the teddy bear, and walk together to the toy box.
- Complete the Action Together: Still with your hand over theirs, guide them to drop the teddy bear into the box.
- Offer Gentle Praise: As soon as the teddy is in the box, release your hand and offer a simple, positive acknowledgement: “There we go. Teddy is all cleaned up. Thank you for helping.”
This technique is a game-changer because it teaches your child three profound lessons.
- First, it proves that your words have meaning and that the task will be completed, one way or another. Ignoring you is not an option.
- Second, it bypasses a verbal power struggle. There is no negotiation or arguing.
- Third, and most importantly, it does this while maintaining a physical connection, showing them that even when you have to enforce a boundary, you are still on their team.
You are helping them succeed, not punishing them for failing.
You Yelled. Now What? The Art of a “Good Repair”

Let’s be realistic. Even with the best intentions and a perfect 5-step method, there will be days when you are tired, stressed, and overwhelmed. There will be days when you lose your patience and yell.
In those moments, it’s easy to be flooded with guilt and feel like you’ve failed. But as experts, we want to share one of the most powerful ‘secrets’ of resilient families: the goal is not to be a perfect parent, but to be a parent who is good at ‘repairing’.
A moment of conflict doesn’t have to damage your connection; in fact, a good repair can actually make it stronger. In this section, we’ll explain why this is so important and give you a simple script to make things right after a tough moment.
Why “Repairing” is More Important Than Being Perfect
When a parent yells, a child’s world can feel a little shaky. The person who is their ultimate source of safety has momentarily become a source of fear. This is a confusing and scary experience for a young child.
The yelling itself is what we call the ‘rupture’ in the connection. But the real, lasting damage doesn’t come from the rupture itself; it comes from what happens next. If the rupture is left unaddressed, the child is left alone to make sense of what happened.
They often create their own story to explain it, and that story is almost always one of self-blame:
“I am a bad kid. I made Mommy/Daddy mad. It’s my fault.”
This is where feelings of shame and anxiety take root.
A ‘repair’, on the other hand, is the act of you, the parent, coming back to your child after everyone is calm and taking responsibility for your side of the interaction.
A good repair rewrites the ending of that story for your child. It changes the narrative from “I am bad and I was left alone in my fear” to “My parent had a hard moment, but they came back for me, and I am still safe and loved.”
This doesn’t just fix the moment; it teaches your child one of the most important lessons in life: that relationships can withstand conflict and that mistakes don’t have to be the end of the story.
The A-B-C of a Perfect Repair: A Simple Script for Parents
Knowing you should repair is one thing; knowing what to say in the moment is another. When you’re feeling guilty or flustered, it’s hard to find the right words.
As experts, we’ve developed a simple, three-step ‘A-B-C’ script that you can use with your child (ages 3-7) after things have calmed down. It’s a formula designed to be both simple enough for them to understand and powerful enough to truly reconnect.
A: Apologize for Your Part
This is the crucial first step. It models accountability and separates your behavior from theirs. It’s important to apologize for your action (yelling), not for having a feeling (being frustrated).
- What to say: “Hey, can we have a chat for a minute? I’m sorry my voice was so loud before. It’s not okay for me to yell at you.”
- What to avoid: A fake apology like, “I’m sorry I yelled, BUT if you had listened…” This is not a repair; it’s a blame-shift.
B: Briefly Explain (in Kid-Friendly Language)
This step gives a simple, relatable reason for your feeling without making it their fault. This teaches them that adults have feelings too, and that feelings are separate from actions.
- What to say: “Mommy was feeling very frustrated because we were late.” Or, “Daddy was feeling tired and my body just got really grumpy.”
- What to avoid: Adult problems. “I had a stressful day at work” is too abstract for a five-year-old. Keep it simple and focused on the feeling.
C: Connect and Reassure
This is the final, most important step. You must end by powerfully reaffirming your unconditional love and connection. This is what makes your child feel safe again.
- What to say: “No matter what, it’s my job to stay calm, and I’m working on it. It is never your fault when I yell. I love you so much. Can I have a big hug?”
- What to avoid: Asking them to manage your feelings. “You forgive me, right?” puts the emotional burden back on them. Your reassurance should be a statement, not a question.
This A-B-C method not only repairs the moment but also models how to take responsibility, a key life skill.
By doing this, you are helping them build a framework for their own future relationships and for practice skills like goal-setting by showing that even adults are always ‘working on’ getting better.
Proactive Strategies: Building Skills to Prevent Future Battles

The 5-step method and the art of a good repair are powerful tools for managing difficult moments. But the ultimate ‘secret’ to a more peaceful home is to play the long game.
The real solution to reducing conflict is not to have better reactions in the moment, but to proactively build your child’s skills so that there are fewer difficult moments to begin with.
As experts, we call this shifting from ‘fire-fighting’ to ‘fire-proofing’.
When a child feels competent and capable, their behavior naturally improves. In this final section, we’ll discuss the ultimate goal of this entire process.
“Skill-Building, Not Fire-Fighting”: The Ultimate Goal
Think about the root cause of most power struggles. They often happen when a child lacks the skills to meet an expectation. They don’t have the emotional regulation to handle a ‘no’, the focus to clean up a big mess, or the motor planning to get dressed quickly.
Their “misbehavior” is often just a signal of a skill deficit. Instead of just managing the behavior, we can focus on building the underlying skill. This is the most effective and respectful parenting strategy of all.
For example, instead of battling over cleanup time every day, you can build their focusing skills by playing a fun board game for five minutes.
Instead of fighting over getting dressed, you can build their motor skills by playing with LEGOs. Every time you help your child feel successful and capable in a low-pressure, playful way, you are making a deposit in their ‘cooperation bank’.
How Our Worksheets Build Cooperation and Confidence
One of the most powerful ways to build these foundational skills is through short, engaging, and successful activities. This is where a well-designed worksheet can be an incredible tool for proactive parenting.
When you sit with your child for ten minutes to complete a fun maze or a simple matching game, you are not just teaching them an academic concept. You are actively building the very skills that prevent listening problems:
- Focus & Attention: They learn to concentrate on a single task from start to finish.
- Frustration Tolerance: They learn to handle small challenges in a low-stakes environment.
- Following Directions: They practice listening to and following simple, visual instructions.
- Confidence: Most importantly, they get to experience a feeling of success and competence, which makes them more resilient and cooperative in other areas of their life.
The goal is connection, not correction. To help you build these skills at home, our complete bundle of preschool worksheets is designed specifically for this purpose.
It is packed with hundreds of fun, play-based activities that build the core skills of focus, persistence, and problem-solving, helping you move from a cycle of yelling to a cycle of joyful connection and learning.
F.A.Q. About Listening & Cooperation Answered
Implementing these new strategies can bring up some specific questions. Here are our expert answers to the most common queries we hear from parents in the trenches.
At what age does this 5-step method start to work?
This method is most effective for children in the 3 to 7-year-old range. For a younger toddler (age 2), their impulse control is still too underdeveloped for these expectations. For an older child (age 8+), while the principles of connection and repair still apply, they may require more verbal negotiation and collaborative problem-solving.
What if my child just laughs when I try to use the 'Helping Hand'?
This is a common testing behavior. If they laugh, it is crucial that you do not laugh back. Maintain a calm, neutral, 'boring' expression. Continue to gently and firmly guide their hand to complete the action without speaking. Your lack of a big reaction is the key. It teaches them that this is not a game; it is a calm, predictable follow-through. They will learn that the 'Helping Hand' is loving, but also non-negotiable.
Is there a difference between not listening and a processing issue?
Yes, and this is a great question. If you have tried the 5-step method consistently (especially Step 1: Connection) and your child frequently seems confused, asks 'What?' often, or can't follow even a simple one-step direction, it might be worth discussing an auditory processing or attention evaluation with your pediatrician. However, for the vast majority of preschoolers, the issue is one of focus and connection, not a clinical disorder.
How long does it take to see results?
Consistency is everything. You will not see a change overnight. You are re-wiring a long-established pattern for both you and your child. If you use the method consistently, you will likely see a noticeable decrease in power struggles within one to two weeks. The key is to not give up if it doesnt work the first few times.
This feels like it takes so much time. What if I'm in a rush?
This is a classic 'go slow to go fast' situation. It feels like the 5-step method takes more time in the moment than just yelling. However, yelling often leads to a tantrum, which can add 10-15 minutes of chaos to your morning. The Connection Catalyst takes 30 seconds. Over time, as your child learns you mean what you say the first time, you will find yourself spending far less total time battling and negotiating, making your routines much faster.
Does this method work for kids with strong-willed personalities?
Yes, in fact, it is often the MOST effective method for strong-willed children. A strong-willed child's primary need is to feel a sense of control and respect. The yelling cycle is a direct assault on that need. This 5-step method, especially the Connection Catalyst and the 'Helping Hand', is deeply respectful. It communicates, 'I see you and I respect you, and here is the boundary'. It meets their need for connection while firmly holding the line, which is what strong-willed kids need to feel safe.
What if my partner isn't on board with this method?
This is a very real challenge. The best approach is not to lecture, but to model. You can say, 'I'm trying out a new strategy to see if we can have calmer mornings'. Let your partner see the positive results in your interactions with your child. Often, seeing that it actually works is more convincing than any psychological explanation you could give.
Is it ever okay to just let it go and not enforce the limit?
Yes, sometimes! This is about being a sturdy leader, not a rigid robot. You have to pick your battles. If it has been an incredibly long and difficult day and your child doesnt want to put that last block away, it might be a moment for grace. The key is that this is the exception, not the rule. If you are consistent 80% of the time, that is more than enough to build a foundation of respect and cooperation.